
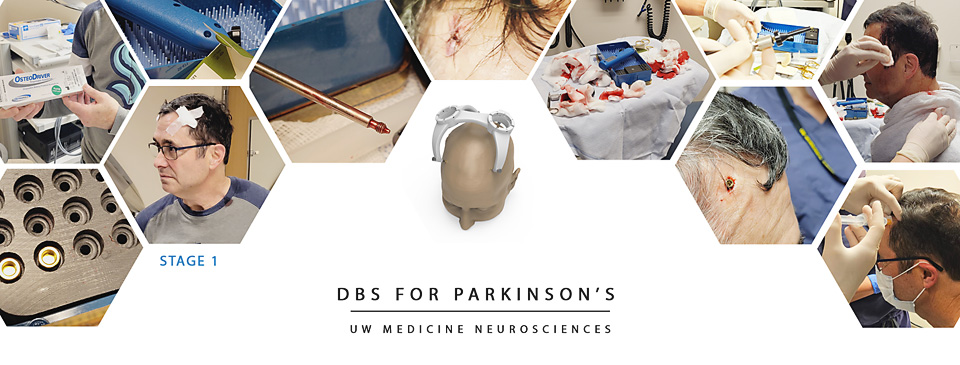
BONE ANCHOR PLACEMENT
- High resolution MRI obtained in the CSI (45 minutes)
- Brought next door to CT scanner
- Four bone anchor locations marked
- 1/2 inch areas of hair clipped
- Local anesthetic injected
- Four bone anchors inserted
- Skin closed with stitches at each of the 4 sites
- Skin glue placed over sites
- CT scan obtained
- Discharged home – Total visit 2 hours
Prior to having a DBS implant, you must go through a series of tests and interviews which explain both the potential benefits, as well as the risks of surgery. They include a general medical exam, neuropsychological testing, MRIs, CT scans etc. All along being reminded it is my choice to have the DBS installed, and that there is no cure for Parkinson’s!
The DBS devise I am going to use is made by Medtronic. They describe it’s function as: “DBS uses a small, pacemaker-like device, placed under the skin of the chest, to send electronic signals to an area in the brain that controls movement. To give you relief, these signals block some of the brain messages that cause the movement symptoms of Parkinson’s.”
From what I understand, currently a normal DBS implant is broken into two surgical procedures. The first one involves the placing of electrodes in your brain. This is done under general anesthesia, which usually takes about 4 to 5 hours. You are required to spend the night in ICU to make sure there are no issues such as brain bleeds or infections. About seven to ten days later, the second procedure is done. It involves placing the neurostimulator (or battery) just under the skin, below the right clavicle, and connecting the leads to the electrodes. This is all done using a local anesthetic. It is usually done as a “Day Surgery”. After a week or two, they turn the DBS on!
For me, they added another step to my implant procedures. To lessen the time I am under general anesthesia, they pre-install four anchors in my skull. A CT scan was taken which is used as a guide to build a platform from a 3D printer. At the time of surgery, the platform is bolted to the anchors. The platform is used as a guide to drill two holes in my skull. The electrodes are then placed in my brain vis these holes. Once done the anchors are removed. This added step is done under a local anesthetic so as to limit the amount of time I am under general anesthetic.
In my case, this addition step was done about ten days prior to implanting the electrodes.
I’ve been told many times I must have a screw loose, but I never imagined it would take four screws to solve the issue!


The head frame (or “halo”) below will be attached to the skull with screws, and remains in place during the entire procedure to keep the head in the proper position.


Leave a Reply